Installing a WordPress website using SVN.
Requirements:
1. Web server.
2. Shell access to that web server. For example ssh.
3. Server on which you want to install a WordPress website must provide a Subversion repository.
I use Aptana Studio 3 with Subersion Plugin (subclipse) as an SVN client.
How to install Subclipse Plugin in Aptana Studio 3
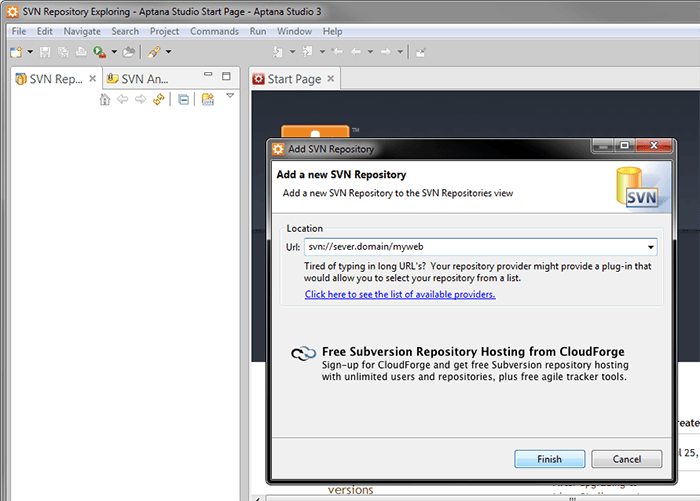
SVN Repository
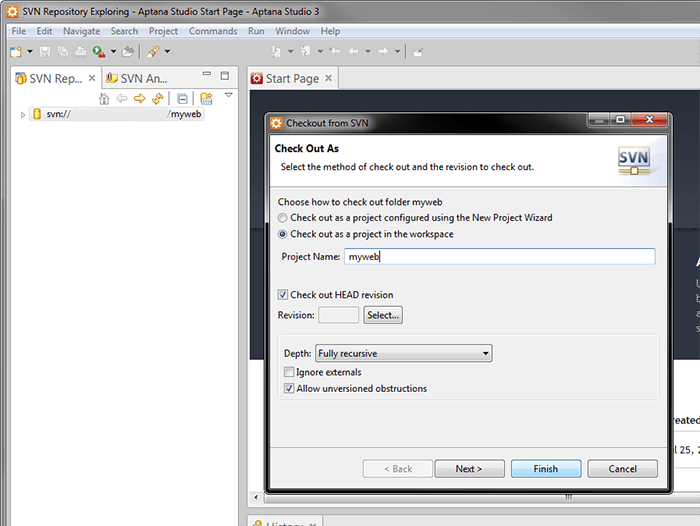
-> Set up an SVN repository on your web server and check it out to your local machine. This creates your local working copy.
Installing WordPress
-> On the root directory of your website in your local working copy (“myweb”) set up the following property ( Team -> Set Property ):
Property content:
wordpress http://core.svn.wordpress.org/trunk/
with the property name svn:externals
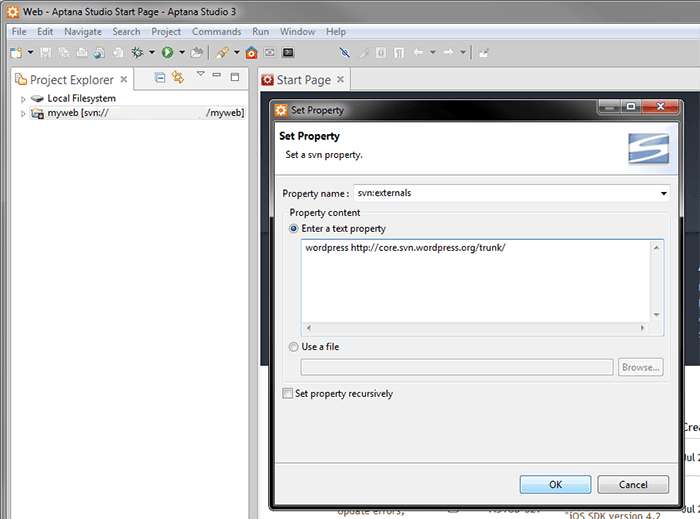
-> “commit” to send this property to the SVN server, and then “update“.
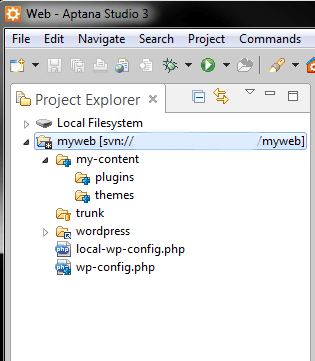
This takes the latest version of WordPress from its repository (http://core.svn.wordpress.org/trunk/), and puts the “wordpress” folder with WordPress core in your “my-web” directory.
Declaring WordPress core as externals causes Subversion to automatically update your WordPress to the newest version when you run the next svn update on your working copy.
Adding “wp-content” outside core.
-> Create “my-content” folder in the root directory (“myweb”) ( which is equivalent to “wp-content” folder in default installation of WordPress). The name “my-contet” is an example, you can change it to whatever you prefer. In the “my-content” directory create two subfolders: “themes” and “plugins”.
Adding themes and plugins
There are two ways to add themes and plugins to the “themes” and “plugins” directories.
-> If you use themes or plugins which have their own SVN repository you can add them by setting them as externals, just like you set WordPress core.
Examples:
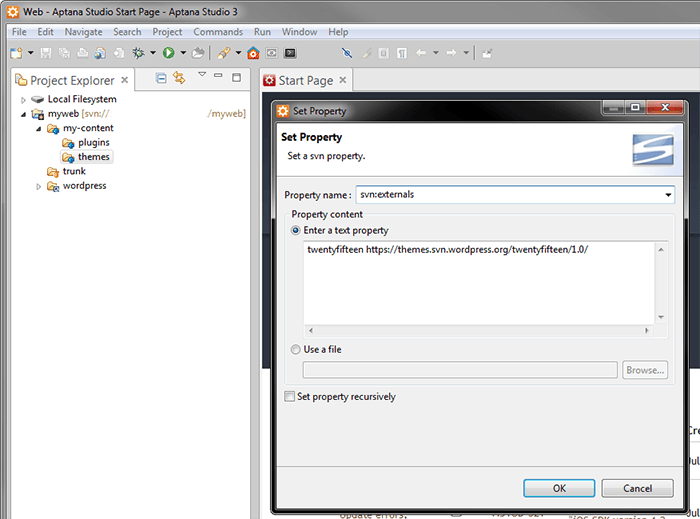
For the theme “twentyfifteen“:
Set external property of the versioned themes directory with property name: svn:externals and property content:
twentyfifteen https://themes.svn.wordpress.org/twentyfifteen/1.0/
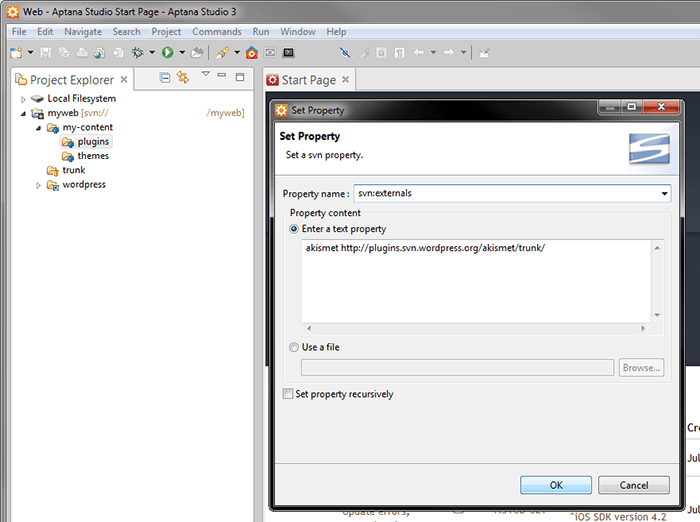
For the plugin Akismet:
Set external property of the versioned plugins directory with property name svn:externals and property content:
akismet http://plugins.svn.wordpress.org/akismet/trunk/
Do “commit” and “update“.
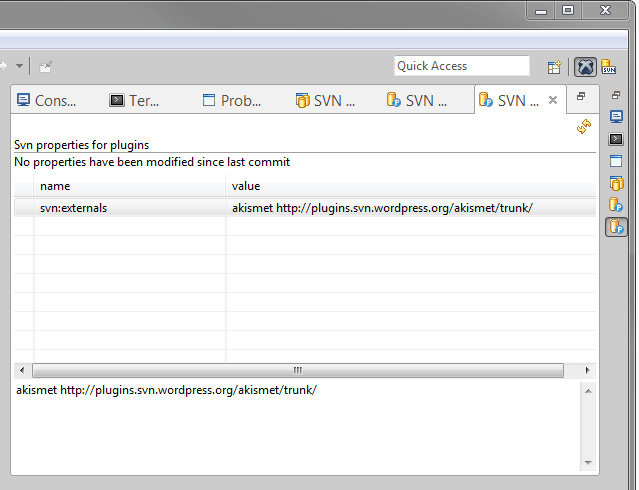
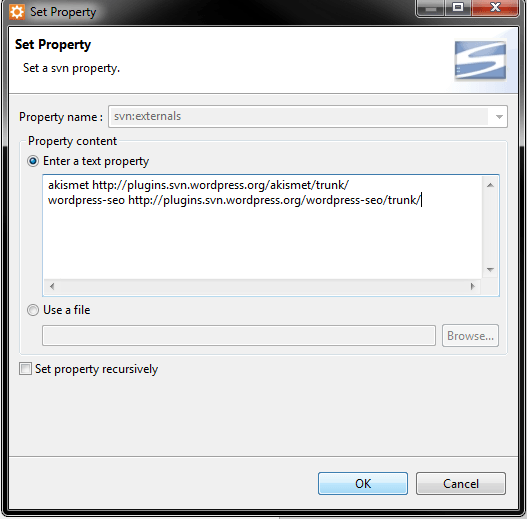
If you want to add other themes or plugins as externals you need to edit existing properties. Right click on the “plugins” directory Team -> Show Properties, and double click on property.
-> The second way of adding themes or plugins is to simply put them manually in to the directories: “themes” and “plugins” in your “my-content” folder.
Don’t forget to add them in to version control!
Wp-config.php
Take the default wp-config-sample.php file from the “wordpress” directory and rename it to “wp-config.php“. Place it in the root directory of your local version: “myweb”. You have two versions of the website: on the server and the local version..
Well, you can create two files, the wp-config.php file for your web on server, and another for your local version. Add required data and then add them to the root directory of your web locally and on the sever. Include them to ignore..
The better way though is to have one wp-config.php which you can include to version control.
-> Create a file, for example local-wp-config.php, in the root of your local web “my-web”.
Add required information about database:
define('DB_NAME', 'localdbname');
define('DB_USER', 'localusername');
define('DB_PASSWORD', 'localpassword');
-> In your wp-config.php add:
if ( file_exists( dirname( __FILE__ ) . '/local-wp-config.php' ) ) {
    include( dirname( __FILE__ ) . '/local-wp-config.php' );
    define( 'WP_LOCAL_DEV', true );
} else {
    define( 'WP_LOCAL_DEV', false );
    define('DB_NAME', 'domaindbname');
    define('DB_USER', 'domainuser');
    define('DB_PASSWORD', 'domainpassword');
}
Add local-wp-config.php to ignore.
Next, commit everything to your SVN repository.
svn checkout
Using ssh run svn checkout of your new SVN setup into the proper location of your web server.
svn checkout svn://sever.domain/myweb /public_html.htaccess
Finally, add .htaccess file to the root directory of your site (public_html) on sever, and give it ignore property.
svn porpset svn:ignore .'htaccess'
Example of .htaccess
Options -Indexes
RewriteEngine on
RewriteCond %{HTTP_HOST} ^(www.)?myweb.com$
RewriteCond %{REQUEST_URI} !^/wp/
RewriteCond %{REQUEST_FILENAME} !-f
RewriteCond %{REQUEST_FILENAME} !-d
RewriteRule ^(.*)$ /wp/$1
RewriteCond %{HTTP_HOST} ^(www.)?myweb.com$
RewriteRule ^(/)?$ wp/index.php [L]